text of this document (ocr, may contain errors)
Page 1
IMPORT.
SERnvice
Return with us to a simpler time when an import
technician needed to know his way around a set of
feeler gauges to make a living practicing his trade.
Back then, most import cars soldiered along with
breaker point ignition systems and mechanical valve
lifters.
Many import car manufacturers held onto their
mechanical lifters, long after hydraulic lifters had been
standard equipment on domestic cars for years. Import
technicians got plenty of feeler gauge practice.
Let’s jump forward to the present. As we men-
tioned in our Toyota Twin Cam Valve Adjustment
article in October ’89, mechanical lifters are becom-
ing nearly as scarce on newer import engines as they
are on their domestic cousins. One by one, import
manufacturers are making the switch to hydraulic
Page 2
lifters.
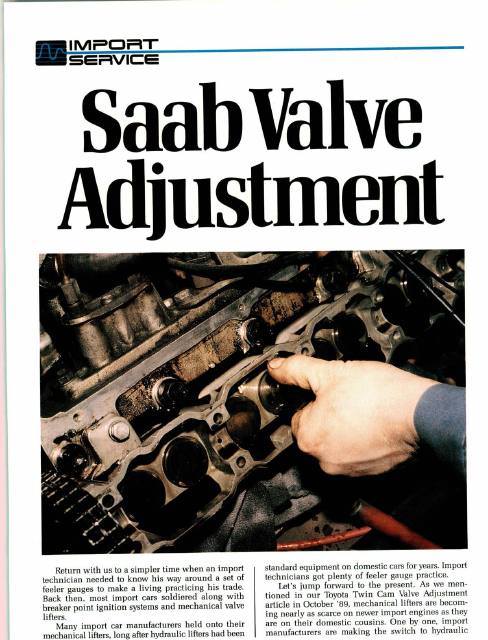
We decided to bring back the good old days, and
brush up our feeler gauge skills at the same time by
doing a valve adjustment on a Saab ‘‘B’’ engine. Saab
used the ‘‘B”’ engine in their 99 models through 1979,
and also in some early 900 models.
Describing a valve adjustment procedure should
be pretty routine on most cars. But it turns out that
a Saab valve adjustment is unlike most others that
come to mind.
Small selective thickness shims (Saab calls them
pallets) sit on top of the valve stems and ride under
the cam follower buckets. This is the opposite of other
shim-style adjusters (like Volkswagen, Toyota, or Fiat),
whose adjustment shims sit on top of the buckets and
under the cam.
Since the Saab adjusting shims ride under the cam
follower buckets, the only way to get to them is to
remove the camshaft first. Depressing the buckets
won't let you exchange the shims like the other engines
we mentioned.
Outpatient Surgery
Removing the camshaft each time the valves need
adjusting might seem like a major project at first
glance. It isn’t nearly as bad as it seems.
* The valve cover can be removed quickly, and access
for checking valve clearances and cam removal is very
good.
¢ The camshaft timing sprocket support maintains
proper valve timing during adjustments and simplifies
reinstallation of the sprocket.
¢ A hex boss on the camshaft makes it easy to turn the
camshaft during valve adjustments.
* When properly adjusted, the valves will hold their
adjustment for a long time. Saab recommends a 15,000
mile valve clearance inspection, and adjustment only
if necessary.
Clearance Recommendations
¢ Intake Valves 0.20-0.25 mm (0.008-0.010 in)
¢ Exhaust Valves 0.40-0.45 mm (0.016-0.018 in)
* Turbo Exhaust Valves 0.045-0.050 mm (0.18-0.20 in)
You're probably accustomed to seeing measure-
ments quoted in the metric system in the pages of
Import Service. After all, we're writing about imported
cars, and the metric system is standard where they
come from.
We found that Saab lists their valve clearance
specifications in the English decimal system first, and
metric second. Their adjustment shims are available
in 0.002 inch (not metric) steps. So take your pick
when you pull out your feeler gauges and micrometer.
We'll list everything both ways for you.
Saab specifies a very narrow 0.051 mm (0.002 in)
clearance range for both intake and exhaust valves on
the ‘‘B’’ engine. Normal wear shouldn't take the valves
very far outside of this range. Finding an extra tight
exhaust valve during an adjustment may be an early
sign of a burnt valve. A very loose valve clearance may
be caused by a valve seat that’s started to work loose
in the head. Alarm bells should be going off in your
head in either case.
Valve adjustment procedures for the later Saab 900
‘“‘H”’ engine are similar to those used on the earlier
“*B”’ engine. Because it lacks an auxiliary shaft, there
are fewer steps required for cam sprocket removal on
an ‘‘H’’ engine. Refer to the Saab Cylinder Head
Removal article in the June 1988 Import Service for
proper ‘‘H"’ engine timing chain tensioner handling
techniques.
—By Karl Seyfert
Most engine service procedures start with ‘‘disconnect
the battery’’. It's especially important here. You could
end up pulling the engine to replace the timing chain
if the crankshaft turns during the later steps of a Saab
‘‘B”’ engine valve adjustment. Remove the spark plug
wiring, crankcase breather hose, and valve cover.
Saab recommends placing the transaxle in third gear,
then rolling the car forward or backward to check valve
clearances. Using a wrench to turn the cam boss while
the cam sprocket is still attached may stretch the
timing chain. A remote starter switch will do the job
safely on stick or automatic models.
Page 3
Turn the engine over until the number one exhaust
lobe points 180 degrees away from the valve stem.
Measure the valve clearance through the window in
the cam carrier. If your measurement is between Saab's
maximum and minimum allowable clearances, no fur-
ther adjustment is needed.
The recommended adjustment range for intake and
exhaust valves is only 0.051 mm (0.002 in). Saab adjust-
ing shims come in 0.051 mm steps, so you can always
find the right shim to put your valve adjustment in the
recommended range. We measured the valve clearances,
and marked the results on a chart as we went along.
The cam sprocket support is attached to the upper tim-
ing chain guide. Use an offset box wrench (arrow) to
loosen the upper chain guide bolt, then move the
guide until the support aligns with the center cam
sprocket bolt hole. Don’t pry between the timing chain
and the chain guide.
Moving the chain guide also loosens the chain enough
to make cam sprocket removal a little easier. Place a
rag over the timing chain opening to catch loose bolts.
The support (arrow) holds the cam sprocket and main-
tains valve timing when the sprocket is slipped off the
camshaft.
Remove one of the cam sprocket bolts, then use the
bolt to mount the center of the sprocket to the support
bracket. Remove the two remaining sprocket bolts, then
slide the sprocket off the end of the camshaft. Stag-
gered cam and sprocket mounting holes prevent in-
correct reassembly.
Slowly and evenly loosen the camshaft bearing cap
bolts. Loosening the bolts unevenly may cause damage
to the camshaft, aluminum bearing caps, aluminum
camshaft carrier threads, or mounting bolts. Note the
location of the numbered bearing caps.
Page 4
Lift the camshaft straight off the camshaft bearings,
then check it for damaged lobes or scored bearing sur-
faces. Also check the tops of the cam follower buckets
for wear. The camshaft and other valve train parts are
well oiled, so wear shouldn't be a problem unless oil
changes have been ignored.
The valve adjusting shims ride under the cam follower
buckets, between the buckets and the valve stems. We
used a magnet (upper photo) to break the oil suction
and remove the buckets. A film of oil usually sticks
the adjusting shim to the underside of the bucket
(lower photo).
Measure the thickness of the original adjusting shim
with a micrometer. Either add or subtract the number
you marked on your chart to the thickness of the
original shim. This gives you the correct thickness for
the new adjusting shim.
We measured an 0.18 mm (0.007 in) clearance on the
number one intake valve before removing the cam. The
original shim measured 1.880 mm (0.074 in). We selected
a 1.829 mm (0.072 in) shim from the shim assortment.
The 0.051 mm thinner shim puts the adjustment in the
middle of the range with a 0.023 mm (0.09 in) clearance.
Measure the new adjusting shim just to be sure, then
place the shim in its slot on top of the valve stem
(arrow). Carefully lower the bucket into place over the
shim and valve spring. The bucket must turn freely
once it’s back in place. Adjust all eight valves using
the same procedure.
Lower the camshaft back into place. Begin installing
the bearing cap bolts by hand. The numbered bear-
ing caps start with number one closest to the cam
sprocket (left photo). Slowly and evenly tighten the
bolts to a final torque of 19 Nm (14 ft-lb).
Page 5
Run through the valves and recheck the clearances
before reinstalling the cam sprocket. The engine is a
free wheeler. The valves won't hit the pistons if the
cam is turned using the hex boss. If you've done your
addition and subtraction correctly, the clearances
should be where you want them.
Turn the camshaft until the mounting holes in the
camshaft line up with the cam sprocket holes. Slide
the cam sprocket back into place, and reinstall two
mounting bolts before removing the bolt from the
sprocket support. Reinstall the third bolt, then torque
all three bolts evenly.
Turn the cam (using the hex boss) until the timing
chain slack between the cam and crankshaft sprockets
is removed. Use a wide screwdriver to push between
the cylinder head lip and the upper chain guide. This
removes the chain slack between the cam and auxiliary
shaft sprockets. Retighten the chain guide bolt.
The ‘‘B’”’ engine sits in the chassis on a slant, so oil
leaks at the lower edge of the valve cover can be a prob-
lem. Remove and replace the old valve cover gasket.
Each valve cover screw should have a new rubber
grommet and lock washer (arrow) installed. Torque the
screws evenly.