text of this document (ocr, may contain errors)
Page 1
IMPORT
SERvice
Saab 900
Clutch Replacement
Most of the cars built today feature front wheel
drive. Different manufacturers chose different front
drivetrain layouts, but Saab's method for getting the
power from the engine to the front tires is a unique
one. Saab 99 and 900 models have a flywheel and
clutch assembly located at the front of the
longitudinally mounted engine. The transaxle is
mounted directly below the engine. The 180-degree
change in drivetrain direction is accomplished by a
clutch shaft splined to an upper transfer gear. The
upper gear is then connected by a chain to a lower
transfer gear splined to the transaxle input shaft.
This unusual design has given the Saab an air of
mystery in some circles, and has probably convinced
many technicians that Saab repair is better left to some-
one else. This leaves an ideal situation for anyone who
is willing to take the time to learn about these cars.
Since Saab specialists are pretty rare in most places,
good ones can expect to be well paid for their
knowledge.
Replacing the clutch on a 900 series Saab isn’t as
difficult or mysterious as you might think, however;
it’s just different. An experienced Saab technician took
us through the procedure recently. Our photos detail
clutch replacement on a 1983 Saab 900. The drivetrain
on the 99 series all the way back to 1975 is constructed
very similarly to the later 900. Most of what is de-
scribed here will apply to the 99 as well. Clutch
replacement on the 99 differs in the following areas.
eA more crowded engine compartment makes
radiator removal a necessity rather than an option. The
cooling fans are mounted on the front of the radiator
which makes removal a tricky proposition. The addi-
tion of air conditioning further complicates matters.
© The 1978 model 99 Turbo (a rare bird) uses a different
style pressure plate than any other model. This re-
uires the use of a thicker retaining ring tool to keep
the pressure plate fingers compressed for removal.
¢ The hood hinge bolts are adjustable. Be sure to scribe
the hinge location before removal. This will assure ac-
curate realignment when the hood is reinstalled.
—By Karl Seyfert
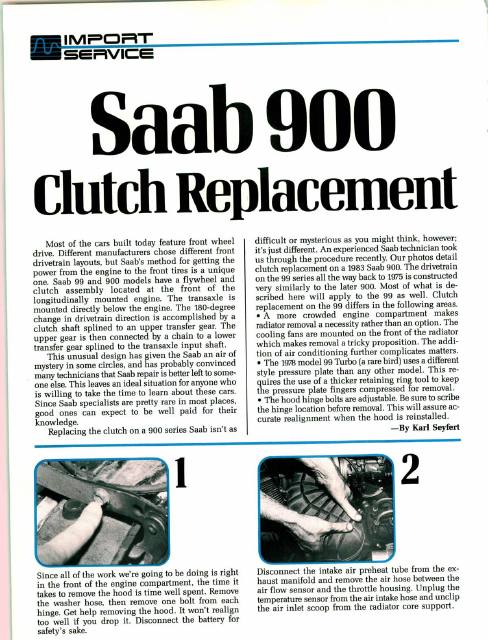
Since all of the work we're going to be doing is right
in the front of the engine compartment, the time it
takes to remove the hood is time well spent. Remove
the washer hose, then remove one bolt from each
hinge. Get help removing the hood. It won't realign
too well if you drop it. Disconnect the battery for
safety’s sake.
Disconnect the intake air preheat tube from the ex-
haust manifold and remove the air hose between the
air flow sensor and the throttle housing. Unplug the
temperature sensor from the air intake hose and unclip
the air inlet scoop from the radiator core support.
Page 2
Leave the preheat tube and air inlet scoop connected
to each other. Remove these two along with the hose
between the air flow sensor and the throttle housing.
Removing these parts may not seem absolutely
necessary at first glance, but the added room you gain
by removing them makes the job that much easier.
The engine wiring harness passes over the top of the
plastic clutch cover. Cut the wire ties that hold the
harness to the cover, then move the harness aside.
Remove the three bolts that hold the plastic cover in
place. The lower left bolt also holds a lower radiator
hose bracket. Carefully remove the clutch cover.
You need to keep the clutch diaphragm compressed
to remove the clutch. This ring fits between the clutch
cover and the diaphragm fingers. Start the tool under
the lip of the cover at the outer edge of the diaphragm
fingers. Then have an assistant depress the clutch so
you can fully insert the tool under the clutch cover.
This Saab tool pushes the release bearing against the
clutch fingers. Place the pry bar behind the bearing
to finish compressing the diaphragm fingers. The
clutch assembly can’t be removed if the clutch fingers
aren’t compressed completely. Use care when prying
if you don’t have the factory pry bar.
Here’s a better look at the Saab tool. The horseshoe
opening on the end fits behind the release bearing.
Leverage is applied at the back of the tool where it rests
against the slave cylinder. If you're making one, the
lever should be at least three-feet long for added
leverage.
Remove the bleeder screw from the slave cylinder first
to allow room for a wrench. Loosen the hose fitting
with a line wrench, then use an angle wrench on the
flare nut to allow enough swing to remove it. These
threads have been known to seize and put up a fight.
Cap the hydraulic line to prevent fluid loss.
Page 3
Remove the clamp holding this front cover on the
transfer gear housing, then the cover and its seal. Note
the location of the breather hole in the cover. A clogged
breather will build pressure in the transaxle and cause
leaks. Remove the plastic impeller (oil slinger) on the
end of the clutch shaft.
The clutch shaft is held in the transfer gear by an ex-
ternal snap ring. The ring sits in a groove in the clutch
shaft. It’s similar to the rings used to keep an outer
CV joint on a drive axle. The first step in removing the
shaft is to remove one pressure plate bolt and screw
it into the end of the clutch shaft.
The other end of the Saab pry bar has a slotted open-
ing. Slip the slotted end over the bolt on the end of
the clutch shaft. Lean the back of the pry bar against
the transfer gear housing and give the pry bar a sharp
jerk. There's not much clearance here, so don't spear
the cooling fan or radiator.
Here’s an alternative method if you don’t have the Saab
tool. Two pry bars hooked on the edge of the bolt head
should pop the shaft loose. This shaft decided to be
difficult and no amount of persuasion would budge
it. The shaft would move further inward, but refused
to come out past the ring. Camera shy, | guess.
There was only one thing left to do. We removed the
radiator and grille and lowered the air conditioning
condensor to get a clear shot at the clutch shaft. We
attached a slide hammer to the threaded end of the
clutch shaft and crossed our fingers. (This is a very
rare problem so don’t let it scare you off).
Here’s the culprit. One swing of the slide hammer and
the shaft was out and in our hands. Earlier shafts have
a gentler slope on the chamfered groove, allowing the
shaft to slip past the retaining ring more easily. If you
grind a small relief in the snap ring groove on the
shaft, it will come out easier next time.
Page 4
The clutch slave is held in place by Allen-type screws,
but there isn’t enough room for a ratchet and Allen
bit. Use an Allen key and box wrench for leverage
since the bolts are installed with thread-locking com-
pound. Saab 99s have hex-head bolts on the slave
cylinder but Allen-heads on the plastic cover bolts.
Remove the five remaining bolts from the pressure
plate. Grab the clutch cover and disc, release bearing
and slave cylinder, and remove them all at once. It’s
a tight squeeze but they will come out if the pressure
plate fingers have been fully depressed. Watch your
knuckles.
The retaining ring tool must be removed from the old
pressure plate. Here’s a safe and easy way to get the
job done. An old flywheel is bolted to the bench and
a threaded rod sticks up from below the bench. Com-
press the pressure plate with an old release bearing
If you don’t have the retaining ring tool or the flywheel
rig, you’ll have to improvise. A press will work and
copper tubing may be substituted for the retaining
ring. Leave enough tubing hanging out so that it can
be easily removed. Whatever you decide to use, be sure
and remove the retaining ring tool.
Disassemble the slave cylinder completely and ex-
amine it for damage or wear. It’s not worth a comeback
if it fails later. O-ring seals are used rather than the
more common cup seals. This one was rather badly
scored after about 50,000 miles. The replacement
cylinder has a larger diameter piston.
it’s safe if you don’t want to wear it.
The clutch disc from the 900 Turbo can be substituted
on 900 non-turbos. Its larger diameter provides more
surface area for a better grip and should wear a little
longer too. The standard pressure plate can be used
with this disc. Check the condition of the flywheel
and pilot bearing before beginning reassembly.
Page 5
Transfer the retaining ring tool to the new pressure
plate. The revised finger design on the new pressure
plate makes it easier to remove and install the retain-
ing ring tool. Lower the plate, disc, bearing, and slave
cylinder into position. Loosely attach the pressure
plate to the flywheel with two top bolts.
Use the retaining clamp from the transfer gear hous-
ing front cover or a similar hook to lift up on the clutch
disc. Hold the disc in position as you guide the clutch
shaft through the disc’s splines. Tap the end of the
shaft with a soft-faced hammer until the retaining ring
locks it in place.
Don’t forget to reinstall this insignificant looking
plastic impeller on the end of the clutch shaft. It’s the
one we removed in step nine. The impeller slings gear
oil over the transfer gears, bearings, and chain. Forget
the impeller, and these parts will be screaming for
mercy before too long.
Replace the housing cover removed in step nine and
its retaining clip. The cover breather hole points to the
top. Reinstall the four remaining pressure plate bolts,
then torque them alternately and evenly. Reinstall the
three bolts in the slave cylinder. Remove the retaining
ring tool from the pressure plate fingers.
While we were in there, we removed your appendix!
I’ve included this photo of a 99 Turbo not to confuse
you, but to remind you to be on the alert for other prob-
lems while you’re doing the clutch. It never hurts to
check the turbo bearing for radial and axial play when
it’s right there in front of you.
Remove the bleeder screw from the slave cylinder, then
reinstall the hydraulic line. Put a rag below the slave
cylinder to catch fluid. Gravity bleeding will remove
nearly all of the air. Have an assistant pump the pedal
to remove the rest. Reinstall all remaining parts in
reverse order of disassembly.